
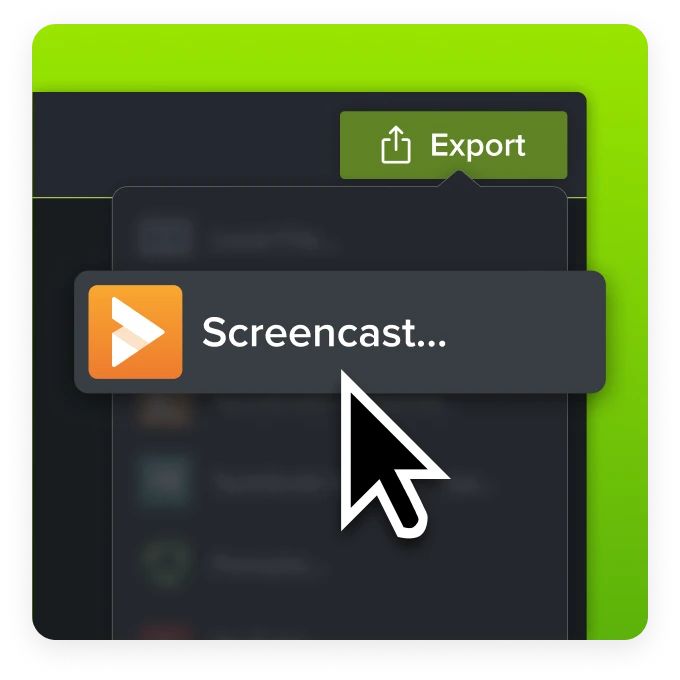
Asynchronous communication made easy with Screencast
Easily share the content you create in Snagit and Camtasia with Screencast, a cloud-based solution for collaboration and feedback.
AI-assisted
Let AI create titles, descriptions, and captions of your content.
Share with anyone
Allow access to anyone with the link or protect with an access phrase.
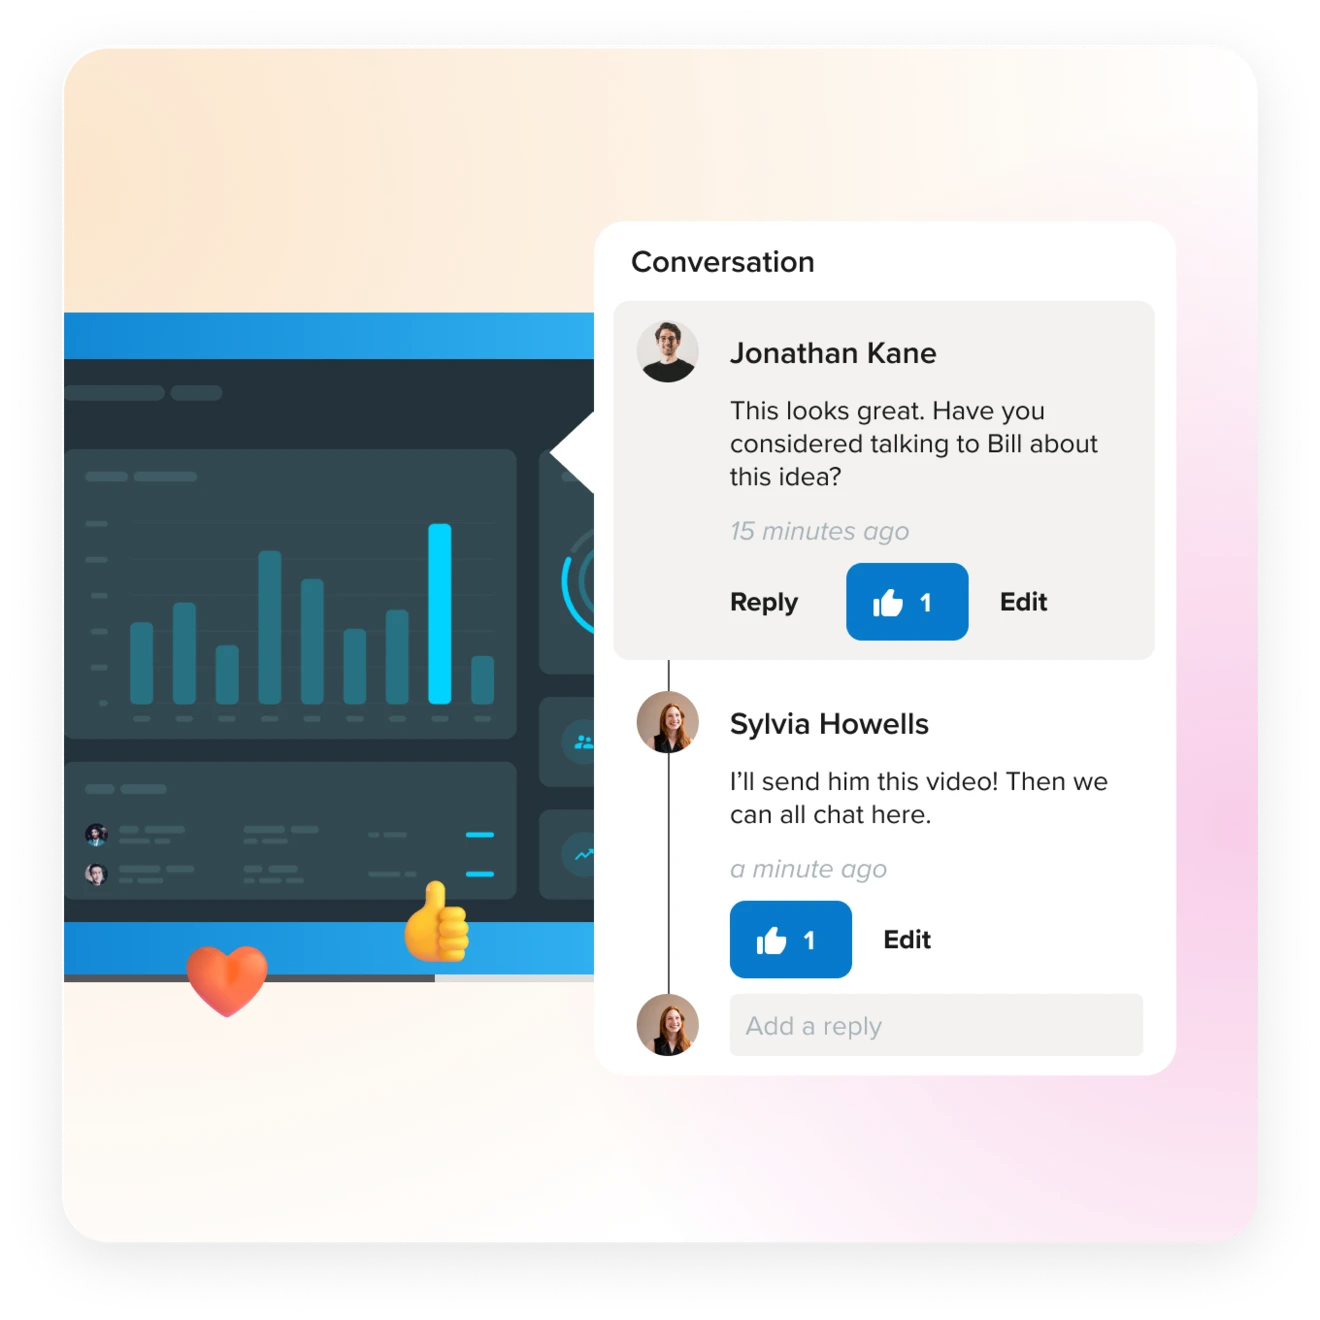
Collaboration
Foster ideas and creativity with comment threads, emoji reactions, and annotations.
Notification preferences
Never miss a beat with customizable notifications.
Review and collaborate on videos
Share interactive videos from Camtasia to Screencast for easy viewing, commenting, and auto-transcription.
Share and comment on screenshots and video messages
Record async video messages with Snagit, edit with easy-to-use tools, and share out your recordings to anyone, anywhere with Screencast.
Collaborate on projects
Conversations and comments
Individualized comment threads, emoji reactions, and time-stamped annotations make working together on new ideas using video messages simple.
Collections
Keep group projects on track with shareable collections your team can contribute to.
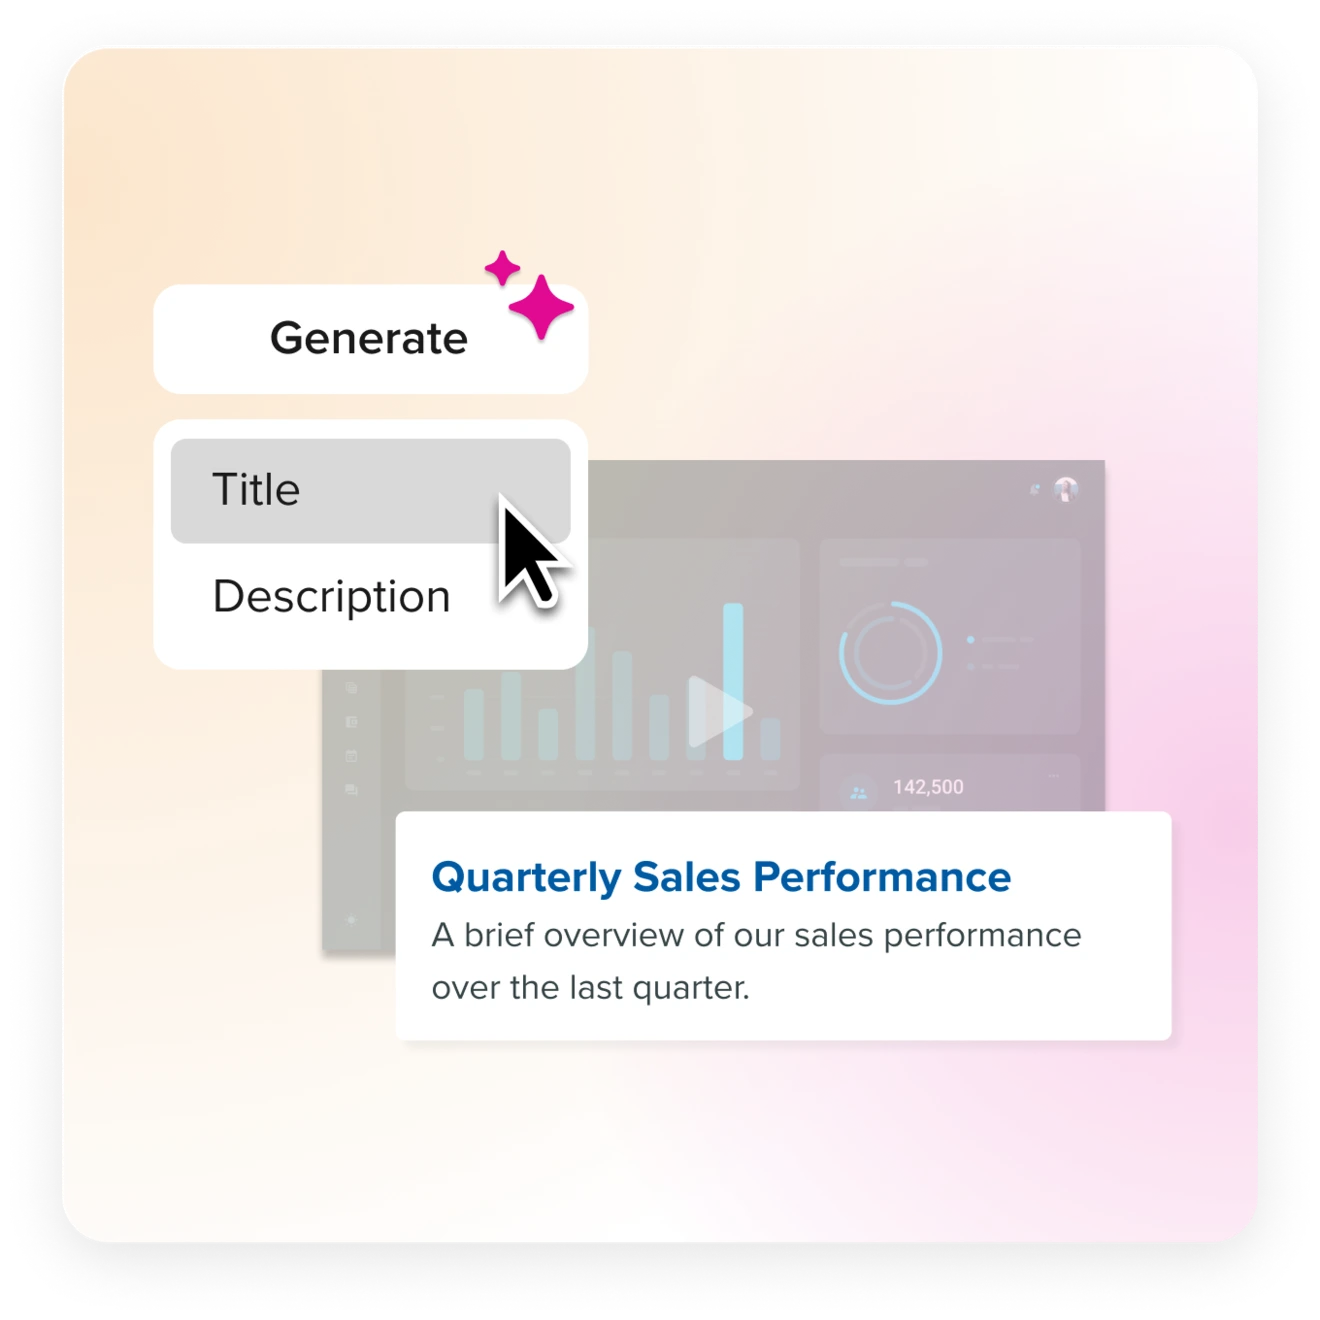
Let AI do the work
Work smarter, not harder, by leveraging AI with Screencast Pro.
Titles and descriptions
Save precious time and stay effortlessly organized with AI-generated titles and descriptions.
Captions
Make your videos more accessible and easy-to-follow with AI-generated captions.
Effortless
Easily share the images and videos you create in Snagit and Camtasia.
Asynchronous
Share your asynchronous visuals, no matter time zones and busy schedules.
Manageable
Password-protect videos, permit access case-by-case, and control comments.
Collaborative
Discuss projects with your team using comments and reactions.
Get Screencast Today
An essential tool for your Snagit and Camtasia creations. Share with anyone, anywhere, even if they don’t use TechSmith products.
Free Account
Free
Share unlimited* screenshots
and up to 25 videos.
Pro Yearly
$99.99 / year
Share unlimited* screenshots and videos. Plus access to the AI-assisted features.
Pro Monthly
9.99 / month
Share unlimited* screenshots and videos. Plus access to the AI-assisted features.
| Free | Pro | |
|---|---|---|
| Video storage | ||
| Video storage | Up to 25 videos | Unlimited* |
| Storage time | ||
| Storage time | 12 months | Duration of subscription |
| Comments, reactions, and collections | ||
| Comments, reactions, and collections | ||
| No log in required for viewers | ||
| No log in required for viewers | ||
| AI-generated captions | ||
| AI-generated captions | ||
| AI-generated video titles and descriptions | ||
| AI-generated video titles and descriptions | ||
| AI-generated video chapters | ||
| AI-generated video chapters | ||
| Custom logo | ||
| Custom logo | ||
| Technical support | ||
| Technical support | ||